This post describes how I shot a timelapse of an entire year consisting of nearly 10,000 pictures.
The Setup
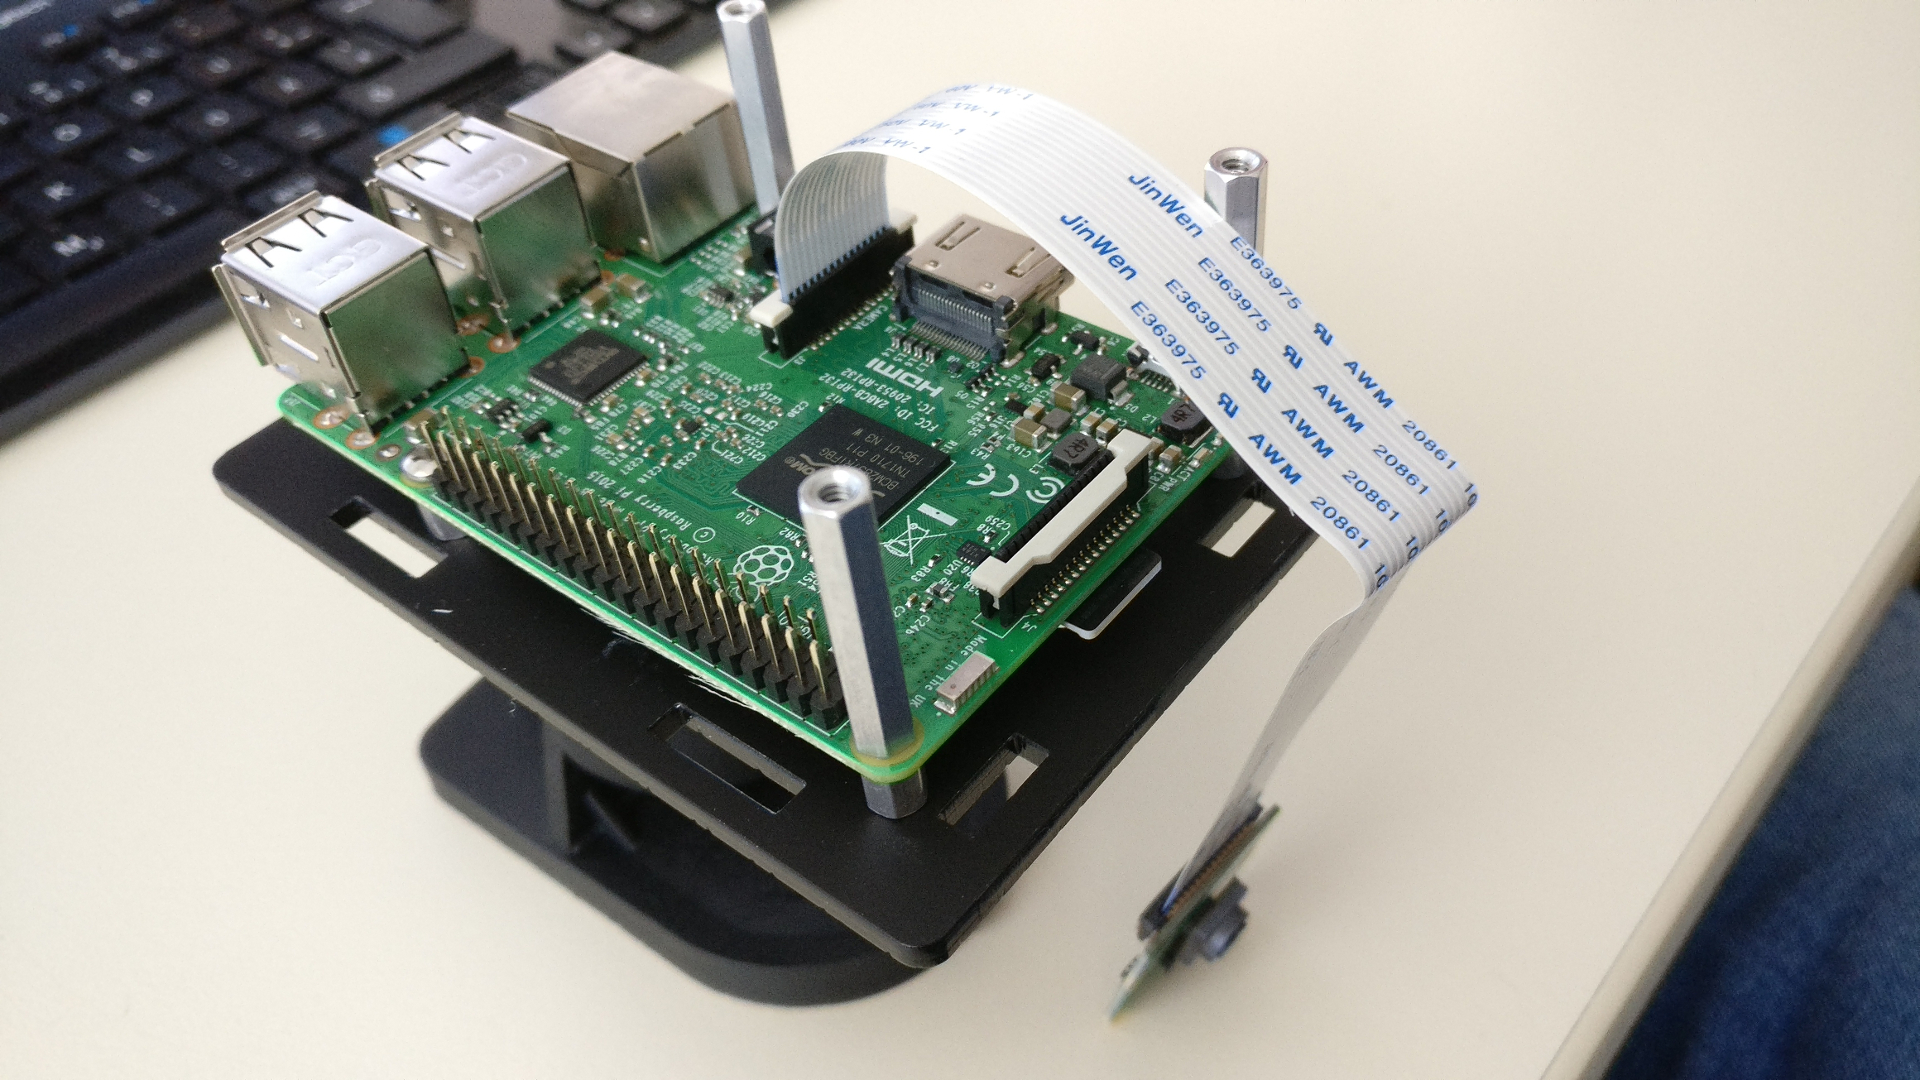
The timelapse was shot with a Raspberry Pi 3 Model B and the camera module v2 . The Pi was installed inside so there was no need to protect it against the weather. To better mount it to the wall the Pi was put inside a case . The benefits of having the Pi mounted inside are also stable Wi-Fi access and a more or less stable power supply (more on that later).
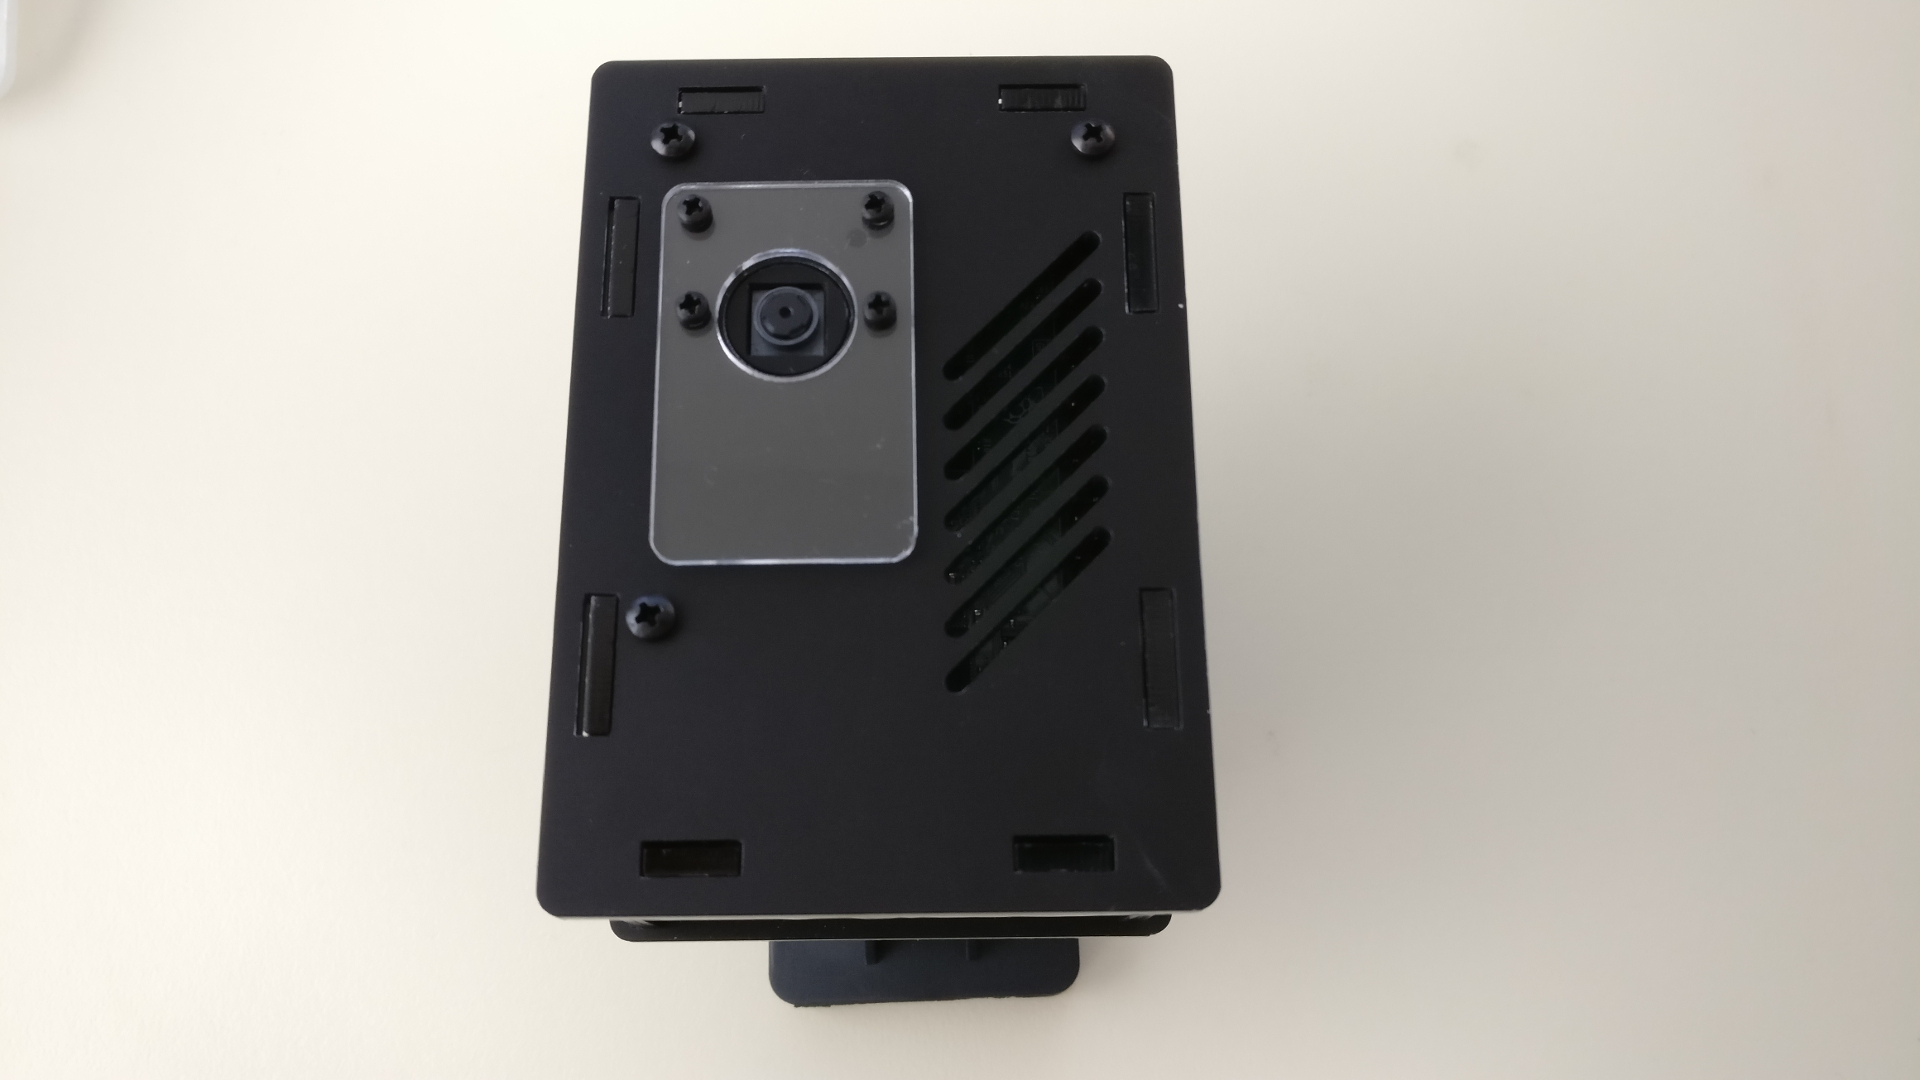
The case has openings for the USB ports, the RJ45 port, HDMI, etc. Since I only needed the power supply I used gaffer tape to seal all other openings.
Taking 10,000 Pictures Automatically And Unattended
Requirements
When regularly taking pictures over such a long period of time a simple cron job is not enough. I wrote a little software which fulfills the rather complex requirements, notably:
- Only take pictures during the day and not when it’s night
- Backup the pictures to a remote location
- Delete pictures to avoid the SD card in the Pi running low on disk space – but only after performing a MD5 check to ensure the picture which will be deleted has been backed up successfully
- Recover from unexpected reboots, e.g. on power failure which occasionally happens
- Deal with a flaky or interrupted internet connection, even for a longer time
- Monitor the temperature of the Raspberry Pi
- Notify if pictures weren’t taken or any other exceptions occured
- Provide a web interface which displays the latest picture taken and a temperature graph The Pi was equipped with a 32 GB SD card and running on Raspbian 8.0 (jessie). I used PHP 7 to implement the software. Overall the whole setup was optimized for requiring little to no administration.
Taking Pictures With raspistill
I used raspistill to take pictures with the following parameters: /usr/bin/raspistill --awb auto --nopreview --raw --quality 100 --encoding jpg --output photo.jpg. When using --raw raw bayer data is added to the jpeg metadata. This results in files between 12 MB and 15 MB in size. At the time of implementing I was not sure if I would need raw data so I decided to use --raw just in case. The pictures have a resolution of 3280 x 2464 pixels To only take pictures during the day I used PHPs built in date_sunrise
and date_sunset
functions. I went with an interval of 30 minutes of taking pictures.
Backing Up The Pictures
The backup was done to a remote location using rsync over SSH. Originally I used --checksum to really make sure files were transferred correctly. Over time and with more and more files this really became disk I/O consuming so I removed it again. By default rsync uses modification time and size for comparison which works as well (and a lot faster) in this case. I also used --bwlimit to avoid blocking the entire upstream with transferring pictures. Once the entire upstream connection is blocked the external monitoring is unable to check the status of the Pi and will trigger an alert.
Removing Old Pictures
Every week a cron job deletes all pictures which were successfully backed up and not older than 14 days. Before deleting a picture from the SD card the MD5 checksum of the local and remote file is compared.
Monitoring And Webinterface
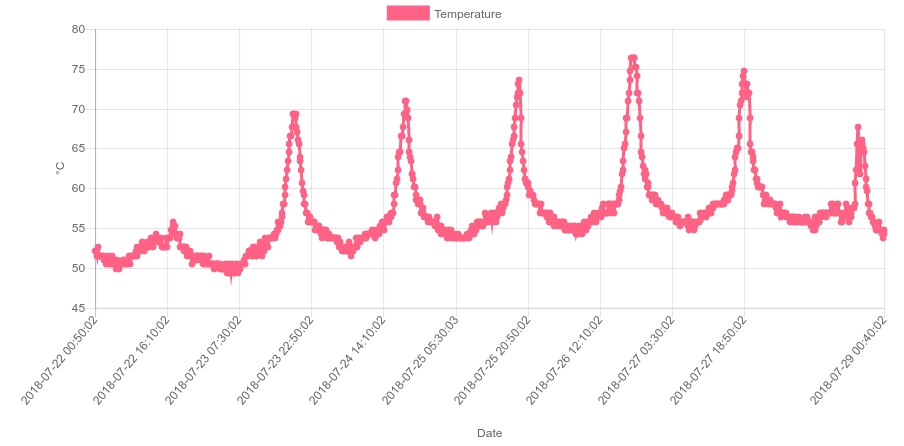
The monitoring (Icinga) does some basic checks including uptime, disk space, load, SSH connectivity, temperature and if the filesystem is writable. The check for a writable filesystem is needed to detect faulty SD cards. When a SD card becomes corrupt it usually is remounted in read-only mode. If this happens no pictures can be saved so this is a rather important check. There were several power failures but the Pi recovered every time on its own and they didn’t have any impact. The web interface is mainly used for checking the latest picture taken and the temperature. The current core temperature can be obtained with /opt/vc/bin/vcgencmd measure_temp. Especially when the Pi is exposed to direct sunlight in the afternoon the core temperature goes up to nearly 80 °C.
Post-processing
Stabilizing (Lucas–Kanade method)
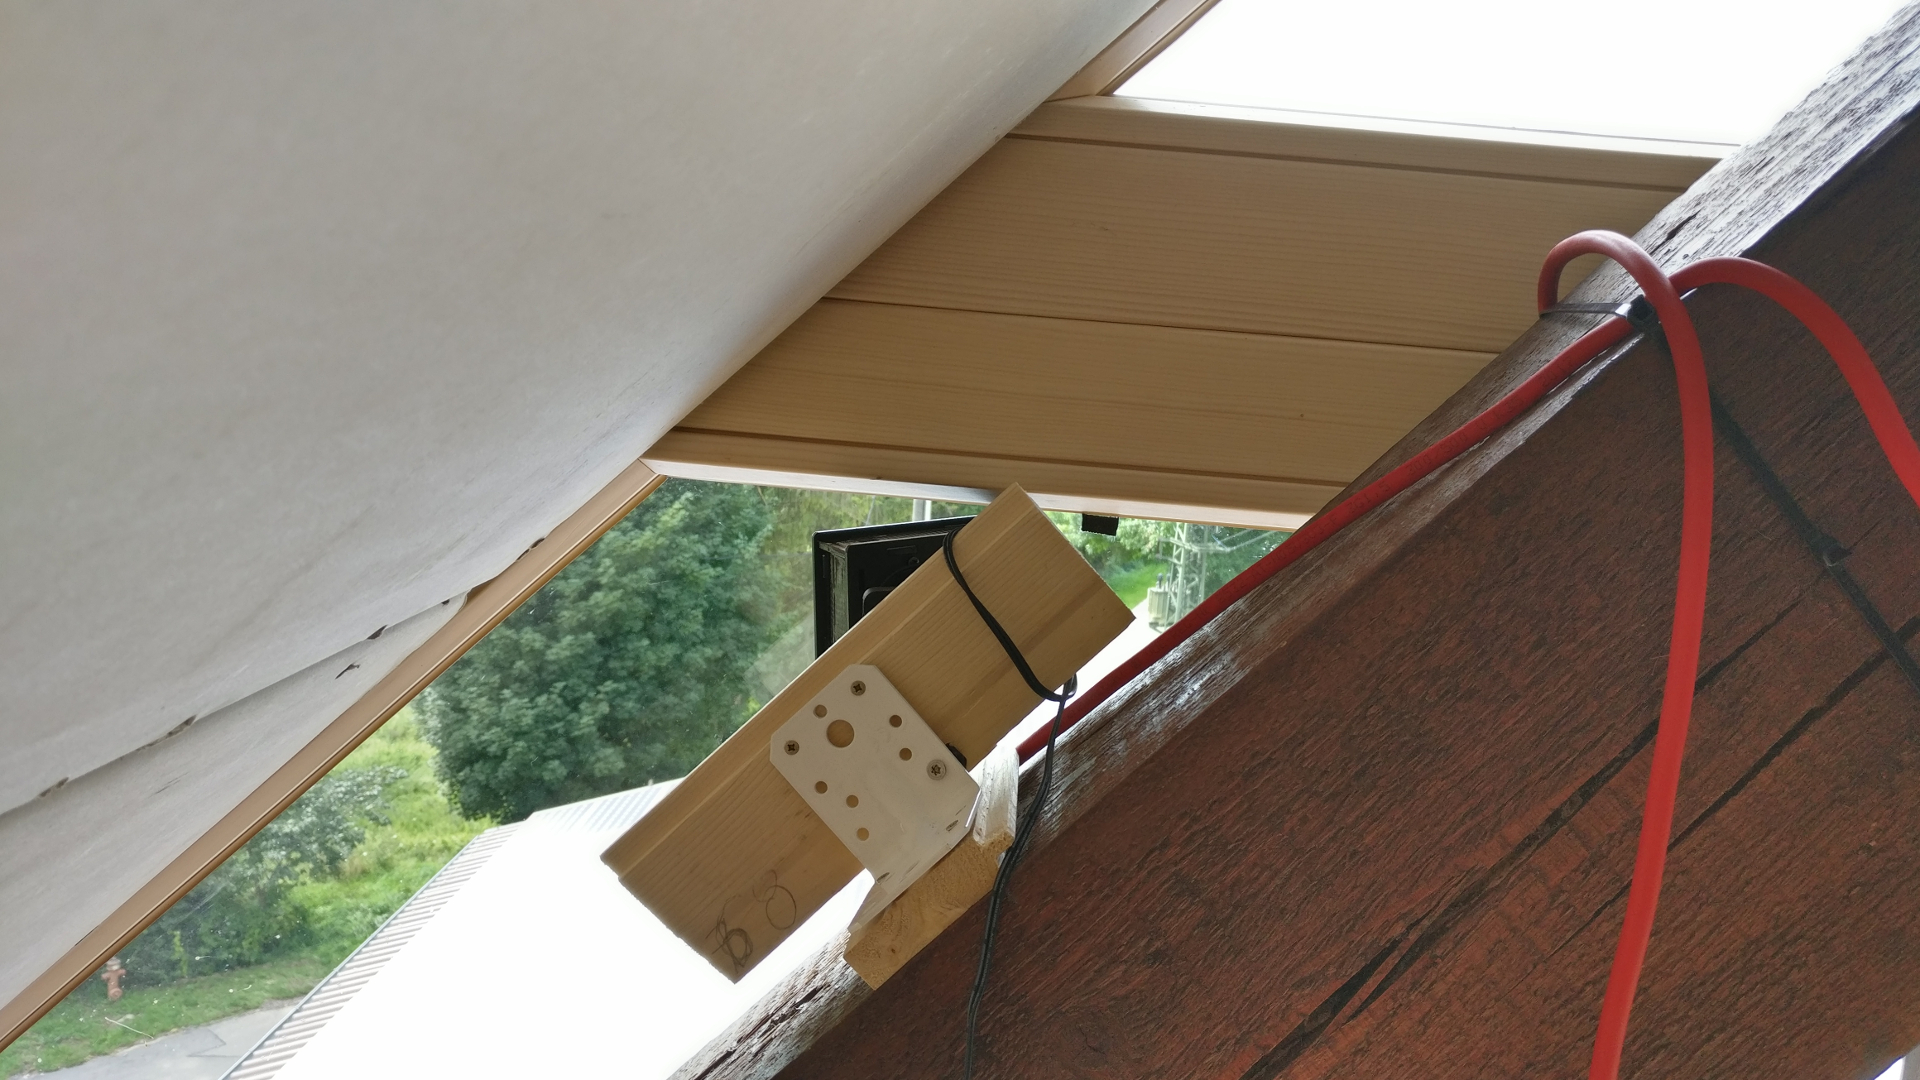
Because of the temperature changes throughout the day and the Pi being mounted on a wood plank the Pi moves very slightly as temperature rises and falls again. This movement can be clearly seen when looking at the footage as the picture detail is not always 100% identical. To eliminate this movement between single pictures the Lucas–Kanade method can be applied. I went with ImageJ and a corresponding plugin which implements said algorithm. The plugin only exports in tif format so a second step is required to convert all files back to jpg or png. Depending on the scenery the plugin achieves best results when its run as the first step in the tool chain.
Cropping
The camera of the Raspberry Pi takes pictures with a picture format of 4:3. Since I wanted to have a HD movie in the end I needed to crop all the pictures to 16:9. A little script did the job but many existing tools should work as well, e.g. GIMP. To achieve the 16:9 ratios the script removed a little bit from the top and bottom of every picture.
Deflickering
Finally the footage needs to be deflickered. There are several scripts available, for example timelapse-deflicker
, which is a Perl script, or deflicker
, which is a Python module. Both work very well. The Python module also supports a sigma parameter which can be used to ignore pictures which are very light/dark.
Rendering The Timelapse
To render the final movie I used Kdenlive
which is able to import a bunch of images and creates a so called Slideshow Clip
. If you need more control over the rendering process you might want to take a look at ffmpeg oder mencoder.